|
Preschool Theme Day Opposites Another good preschool skill to introduce to your little one is the idea of opposites. Explore this concept using this fun Theme Day. Print out the Family Theme Day Planner and decide which activities you’d like to do and in what order.
FURTHER PREPARATION: For added fun for this Theme Day wear your shirt inside out and wear a baseball cap backwards! SONGS: For an opposite song play “Hello Goodbye,” by the Beatles. A children’s song that would fit this Theme Day would be “Hot and Cold.” Find the lyrics and hear the tune here: http://www.kididdles.com/lyrics/h056.html Another children’s song with actions for Opposite Day would be “North and South, East and West.” Check here for lyrics and to listen to a clip: http://www.kididdles.com/lyrics/n019.html
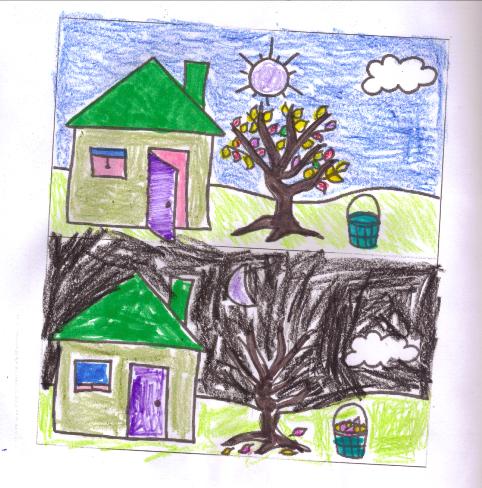
SCRAPBOOK ACTIVITIES: COLORING PAGES: Print out my “Find the Opposites” Colouring Page and together find the opposites. HINT: Look for these opposites: Day/Night, Open/Close, On/Off, Up/Down, In/Out or Full/Empty, High/Low.
PUZZLES: Work together with your preschooler to help him/her find the words in this Easy Opposite Word Search. Check here for the answer key: Easy Opposite Word Search Key
BOOKS: Raid your child’s bookshelves to find any books about opposites. OR Go to the library with your child to find some books introducing opposites. OR Go to the library on your own to find books about opposites to have already on hand for your theme day. Many libraries allow you to go online and search for titles based on subject (search for “opposites” under “Children’s books”). Reserve them if you can to save time.
Here are some picture books about opposites:
· Big is Big (and little, little) A Book of Contrasts, by J. Patrick Lewis and illustrated by Bob Barner, Holiday House, Inc., 2007—Using rhymes and colourful cut paper illustrations this book presents some basic opposites.
· Black? White! Day? Night! A Book of Opposites, by Laura Vaccaro Seeger, A Neal Porter Book, 2006—Kids will like this book as it has big lift the flap pages to reveal the opposites.
· Exactly the Opposite, by Tana Hoban, Greenwillow Press, 1990—This book uses only photographs and no words so it is a great book to encourage your child to figure out the opposites on his/her own.
· Imagine, by Ruth Brown, Andersen Press, 2006—This rhyming bedtime book offers opposites as imaginative possibilities to a sleepy child.
· The Opposite, by Tom MacRae and illustrated by Elena Odriozola, Andersen Press, 2006—This is a fun story about a little boy named Nate who is visited by The Opposite, a mostly invisible being who makes the opposite thing happen which ruins the boy’s day. So instead of pouring his milk up Nate pours it down! Can he find a solution to make The Opposite disappear?
· You and Me: We’re Opposites, by Harriet Ziefert and illustrated by Ethan Long, Blue Apple Books, 2009—There are playful illustrations of zoo animals in this book who point out opposites.
For something different try this book:
· Art Museum Opposites, by Katy Friedland and Marla K. Shoemaker, Temple University Press, 2010—Featuring art from the Philadelphia Museum of Art this is an unique approach to the opposite books as it not only uses museum art but gives discussion questions which makes this a great interactive book.
CRAFTS: LEFT AND RIGHT HAND PRINTS:
Materials: Coloured paper, child-safe scissors, glue-stick, damp cloth for sticky fingers, (Optional: you could use paint for the hand prints instead of tracing).
Step 1: Have your child pick out the colours for the paper to use. Step 2:Trace your child’s left and right hand onto coloured paper. Step 3: Help your child cut the hands out using scissors. Step 4: Have your child glue the hand prints onto another sheet of coloured paper. Step 5: Write the word Left and Right on the appropriate hand and explain that left is the opposite of right or help your child to write the words on each hand as we’ve done.
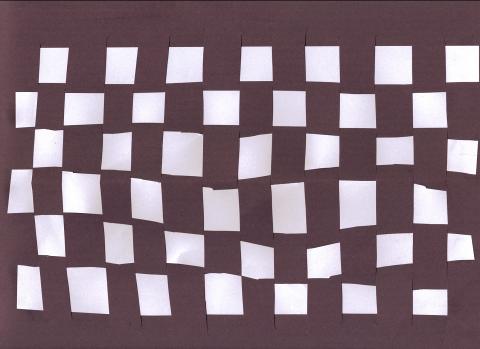
BLACK AND WHITE WEAVING: Materials: Black paper and white paper, child safe scissors, glue stick, damp cloth for sticky fingers. Step 1: Fold a piece of black paper in half (have the longer sides of the paper horizontal and the shorter sides vertical) and cut a number of slits from the middle fold to just before the outer edge without cutting all the way through. Step 2: Unfold the paper and lay it horizontally (so the longest side of the rectangular paper is horizontal and the shortest sides are laying vertical). Step 3: Cut a number of white strips of paper out of the white paper (make sure the paper is the same length as the black paper so they will be the same size). I let my son cut most of the stripes and as you can see it doesn’t matter if they are not even because it just will create a fun pattern. Step 4: Show your child how to weave the white strips of paper over and under the horizontal slits cut onto the black paper. Start with one strip of white paper and weave it over first and then under continuing the pattern. With the next strip of white paper start by weaving it under first and then over continuing the pattern until the end. Step 5: With each strip of paper, once it is woven to the end, gently slide it over to the left and then glue the loose flaps of paper to the black paper. Continue to do this (weaving, sliding and gluing) until there is no more room in the red slits for a piece of white paper to fit. Step 6: (Optional) You can now take this to an Office Supply Store to have it laminated, giving you a place mat than can be used over and over (and wiped clean when dirty with food).
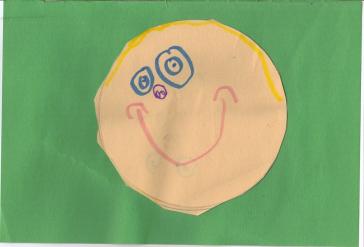
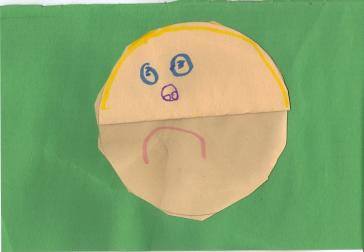
HAPPY/SAD LIFT THE FLAP:
Materials: Paper, a bowl to trace around, a pencil, markers or crayons, child-safe scissors, glue-stick, damp cloth for sticky fingers.
Step 1: Have your child trace around a bowl two times to make two circles. Step 2: Help your child cut out the two circles. Step 3: Fold one circle in half and then apply glue to one half. Step 4: Stick the half circle over the second circle so that when the folded half is unfolded to reveal the circle it covers the circle. This is the lift the flap part of the craft. Step 5: Glue the circles to a piece of coloured paper. Step 6: Have your child draw a simple happy face on the top circle. Step 7: Ask your child what the opposite of happy is and then flip the circle up to reveal a second surface. Have your child draw a sad face on this one. Step 8: Review that happy is the opposite of sad and then display or glue the craft in your Family Theme Day Scrapbook.
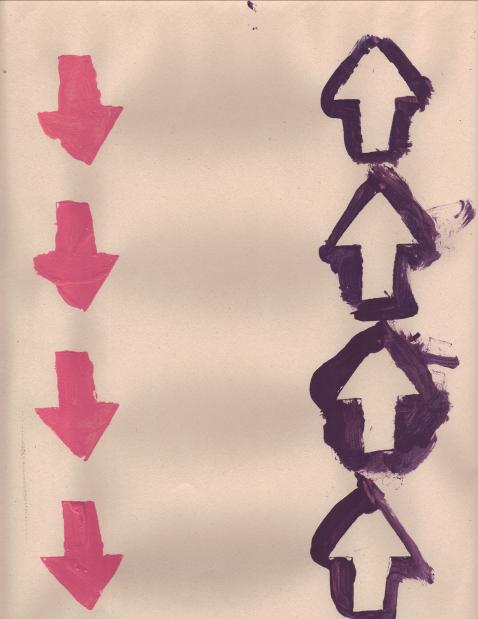
UP/DOWN ARROW STENCILS:
Materials: Piece of hard construction paper, X-acto knife or craft knife (adult use only), cutting board, sponge or paint brush, paints, waxed paper, art smock or old clothes to wear, newspaper or plastic to cover the table.
Step 1: (Parent step) Using a craft knife, carefully cut out an arrow shape on a piece of hard construction paper. Step 2: Show your child how to paint inside the stencil shape of an arrow. We used the inside stencil facing downwards to represent down. Let your child make paint stencils of the down arrow on a piece of paper. NOTE: It helps if you (the parent) hold the stencil in place while your child paints inside the shape. Step 3: You can either turn the stencil so that the arrow faces up or do as we did and use the cut out piece as an opposite stencil and have your child paint around the shape this time to outline the up arrow. NOTE: Again it helps if you (the parent) hold the shape while your child paints around it as this can be tricky for little fingers. Step 4: Let the picture dry and then display it our glue into your Family Theme Day Scrapbook. Don’t forget to review the words “up” and “down”!
FOOD: SNACK:
Wet and Dry Banana: Dip a banana in melted chocolate or yogurt for the wet and then dip it in shredded coconut or crushed graham crackers or nuts for the dry.
In and Out Eggs: Have your child help make these so the concept of “in and out” makes sense.
Ingredients: hard boiled eggs, mayonnaise, paprika, (optional: pureed veggies like carrots or cauliflower).
Step 1: Carefully cut the hard boiled eggs in half and remove the yolk. Step 2: Mash the yolk and add a little mayonnaise and paprika (to taste). Step 3: If you happen to have any pureed veggies around ( I have cubes of these in the freezer to add to all sorts of things) add some to the yolk and mash together. Step 4: Gently scoop some of the yolk mixture back into the egg white halves and serve reviewing “in” and “out”.
LUNCH:
Have a “hot and cold” lunch with hot soup and a cold cucumber sandwich.
DINNER:
Serve your dinner with veggies and dip to illustrate “in and out”.
Make double stuffed potatoes with your child to illustrate “ in and out”.
Make sweet and sour meatballs (or some other dish with sweet and sour sauce).
DESSERT:
Make a black and white dessert with either white cake and chocolate frosting or white vanilla ice-cream and chocolate sauce.
Make a Pineapple Upside Down Cake. Check online or in your favourite cookbook for a recipe.
Use juice in the Liquid and Solid Experiment below and serve mini popsicles for dessert.
LEARNING ACTIVITIES: MATCHING OPPOSITES: Print out my Matching Opposites Worksheet and work with your child to match the pictures.
FLASHCARD MATCHING : Print out my Opposite Flashcard Sheets and have your child colour the pictures. Cut the cards out (glue them to coloured paper to make them stronger or laminate them before you cut) and work together with you child to match the opposites. Opposite Flashcard Sheet 1, Opposite Flash Card Sheet 2, Opposite Flash Card Sheet 3 and Opposite Flashcard Sheet 4. QUEST: Print out my Opposite Quest Worksheet and together as a family search for objects to fit each category. You could either help your child write the appropriate word on the chart or have him/her draw a picture of the object that fits the category.
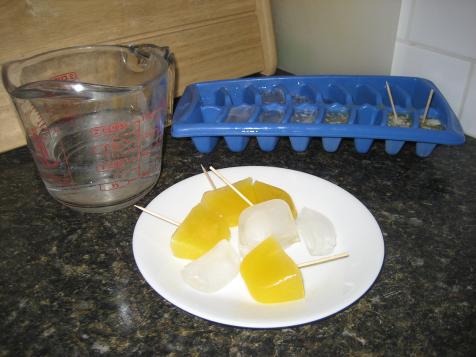
LIQUID AND SOLID EXPERIMENT: Show your child a measuring glass full of water and explain that it is a liquid. Help your child pour the water into an ice cube tray and carefully put the tray into your freezer. Have your child guess what will happen next. Let the water sit in the freezer all day. When your Theme Day is over take the ice cube tray out and show your child the water. Explain that when it is frozen the water turns to a solid: ice! HINT: This experiment could also be another snack. Just use orange juice instead of water and put plastic wrap over the ice cube tray. Then carefully insert toothpicks through the plastic wrap so that each cube of juice will have a little toothpick handle when they are frozen.
EXTENDED ACTIVITIES: AUDIO VISUAL: Search through your child’s DVD/ video collection (or visit your local library before hand or the Video Store) to find your child’s favourite shows teaching opposites. For something different try this family movie: · Opposite Day
OUTDOOR ACTIVITIES: Go on a Family Walk and try to complete the Opposite Quest activity from above but this time searching for things found outside.
|
|
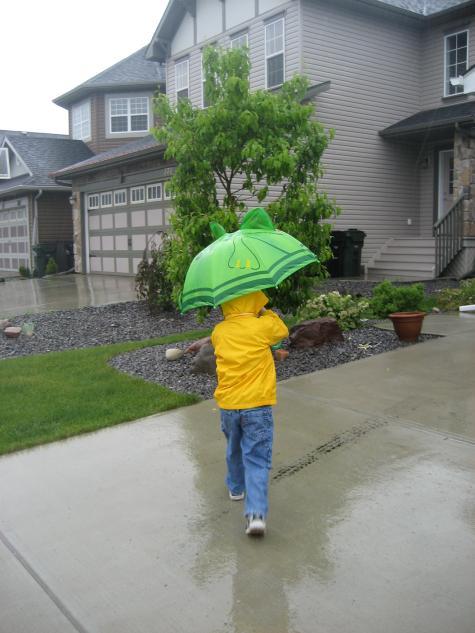
Photo: C Wright |
|
The opposite of wet is dry! |
|
“Find the Opposites” Colouring Page |
|
Left and Right Hands |
|
Black and White Weaving |
|
Happy and Sad Lift the Flap |
|
Up and Down Stencils |
|
Liquid and Solid Experiment |


|
|